Recently, a friend of mine asked for some help with an underfloor heating system. He was renovating the property that he was planning on moving into and had received a quote of £15,000 for a system installation (without a floor on top), and we decided this was a bit of a rip-off.
Any underfloor system you install will add floor height, unless you dig down. This was not a problem for us as the door frames of the house were around 2 inches above the floor level. If your door frames are flush, then you might want to consider whether it makes sense for you.
Overlay isn’t the easiest thing to get your head around when coming from a place of zero background. There are lots of options, and I’m not convinced by the thermal outputs of most of them.
I had hoped that we might be able to use an egg crate system which allows for 16mm pipes at a 100mm spacing; however, the floor was suspended, and after calculating the dead load capacity of the floor, it was not feasible. Egg crates enable snail rather than serpentine laying of pipes (so they spiral in and out); the advantage of that is an even temperature across the floor. The egg crate system would weigh around 50kg/m² with a very minimal 25mm screed, so it was decided that the only approach was to use overlay.
Since I knew very little about overlay, I watched a few videos on underfloor heating and then rang up an underfloor heating company and asked for advice. I had already persuaded my friend to lay tiles on top of any system to improve heat conduction and the efficiency of the system, so they suggested using the cement-coated overlay panels. It was either these or foil-coated. They suggested the cement-coated panels are the more premium option and offer better thermal conduction, though I’m sceptical. I don’t really see how lots of heat would travel through such a thin layer of cement, but perhaps I’m wrong.
The cement coating meant that we could use tile adhesive to stick tiles directly to the top of the board without requiring a screed, so that seemed like the logical choice.
Heat Outputs- 20mm panel
Heat Outputs – 20mm Panel
ZL-CPS300-16 Datasheet Download
The website lists the following heat outputs at 50 degrees C, while the datasheet just lists 80W/sqm:
- Under tiles: 97w/sqm
- Under laminate, wood, engineered: 65w/sqm
- Under carpet, vinyl: 51w/sqm
Which is right? I don’t know.
Wait, you didn’t do a full heat loss calculation?
I didn’t do a heat loss calculation as it was irrelevant to the build. The entire purpose of this underfloor heating installation was to get it in as soon as possible for the lowest price and the best reasonable specification. We weren’t actually doing a full system design. It was more about trying to reduce the cost of the future heat pump installation while maximising comfort.
I had done some basic calculations; I knew the system we planned to install had around 70sq/m of area and would produce around 3kW of heat at 40 degrees C with tiles.

https://www.theunderfloorheatingcompany.co.uk/product/high-density-cement-coated-xps300-insulated-overlay-board-1200x600x20mm/


Fixing the boards down
I was told by the underfloor heating company to fix these down with tile adhesive – that is if you are putting tiles on top of. If you are using laminate on top of them you should use mechanical fixings. https://theufhgroup.co.uk/products/tekwarm-ufh-self-tapping-screws-and-washer-for-20mm-board-set-box-of-100-pcs
I had laid tiles before, but nothing this size. There was a small learning curve in applying the tile adhesive – this won’t apply to you as you won’t make this mistake.
After watching a few videos, I chose the following tool. As you can see, it has large curved cutouts. Generally, cutout size is in proportion to the tile size, so the bigger the tile, the bigger the cutouts.
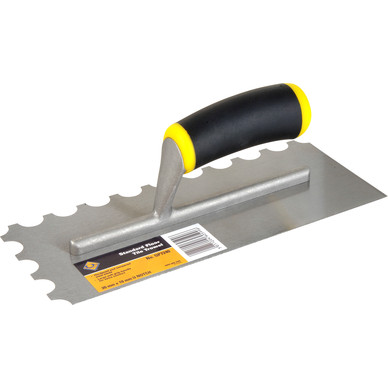
Since the tile trowel has ‘professional’ in its name, we believed it would elevate us to a higher standard of workmanship. Unfortunately, we had made an error, and having a ‘professional trowel’ didn’t make us professionals.
Another Important Point! Level the Floor Before Installing the Overlay!
After doing a fantastic job of installing the overlay, we patted each other on the back. Well done us. Then we got out the laser level and found out that our level plywood base that we installed onto was not, in fact, level in all places. But what is two centimetres of fall across runs between friends? It’s a 1 in 200 fall, so not much really.
We would have to rectify this error later. We had initially thought we could just level by using tiles and tile levelling pegs https://www.screwfix.com/p/no-nonsense-tile-levelling-system-kit-201-pieces/609PG?tc=KT8&gStoreCode=KT8&gQT=1 However, I would soon find this was not an option.

Time for Some Polypipe
The pipe we installed came in 300m runs and was relatively easy to install once we figured out the technique, which turns out isn’t carrying 300m of pipe and unravelling it by spinning it in mid-air. Rolling it is better—who knew! As you unravel it, you have to turn with the corners; this is fairly easy and logical once you figure it out.
Important!
How long should your runs be? Most documentation online states the maximum length that your pipe runs should be (leaving then returning to the manifold) should be 100m with 16mm pipe. This is a limit not a target, I wish I had thought more about it before installing.
We ended up with four equal length runs of 90m each. However, if I were doing it again I would have dropped down to 60m or even 50m. This is because the temperature difference between the flow and return would be less so the temperature drop across the floor would be less. It would require a larger manifold but there would be a reduction in pressure loss.

Now is the time to do a pressure test
You will need to connect up your pipes to the manifold and check for leaks. This part isn’t shown because it wasn’t done. My friend didn’t want to buy the manifold yet, what a gamble.
“Those Aren’t Tiles; Those Are Laminate”
A ordering error that made life a little challenging. While tiles had been specified, laminate had been ordered. This was a problem as it reduced the thermal conductivity. This was unfortunate, but since I had assumed we might need to put a radiator somewhere, I was not particularly bothered.
However, if I had known that we were using laminate, it would have meant we didn’t have to use tile adhesive to fix the overlay down instead could have used mechanical fixings.
“What Do You Mean There Is No Latex in Latex Screed!”
Since our floor wasn’t level and we wanted to maximise conduction of heat from the polypipe to the floor, we decided to lay a thin screed. While you might believe that ‘self-levelling’ screed is, in fact, self-levelling, it isn’t. So it won’t magically find the lowest point in your floor unless you are pouring a thick layer. It is, however, very liquid and easy to lay.
We spent a lot of time trying to figure out what the most appropriate type of screed to use was. The choices are either fibre-reinforced or latex-based. I couldn’t figure it out, so I rang up one of the companies that makes it, who told me ‘there is no latex in latex screed’. So I decided to make the executive decision and use my civil engineering background. I know that concrete has very little tensile strength, which means it is bad in bending unless it is reinforced with steel. I couldn’t see why a thin layer of screed wouldn’t be similar, in that it would have very poor tensile properties. Since we were going to try and do a thin layer across the floor with a bit deeper in places, I wanted some tensile strength in case the floor moved and expanded. So we went for fibre-reinforced rather than ‘not actually latex’ latex screed.
If your floor is flat, you can use dry screed overlay for thermal mass: https://www.insulationuk.co.uk/products/fermacell-r-flooring-2e11-1500-x-500mm-x-20mm
Get a Paddle Mixer
You will need a paddle mixer—a drill paddle mixer is not suitable. You need an actual one. For example: Energer ENB768MIX 1200W Electric Paddle Mixer 220-240V. I didn’t get this one; I borrowed a friend’s old DeWalt one, but they are similar.
I wouldn’t recommend a battery one as if you are mixing 40 bags of screed, then you won’t want to be waiting for batteries to charge. You are meant to mix each bag for 2 minutes, so you would need a lot of batteries.
Factor in the Pipe Cutouts
In the overlay, there are gaps where you haven’t put pipes. You can either fill these with pipes, or they will fill with screed. The amount of screed that they will require to fill is significant, so remember to calculate it. We didn’t, so had to make a few trips to Screwfix.
Remember to Prime the Overlay Boards
If you are going to put a screed over your overlay boards, then it is recommended that you prime them. This is apparently to improve adhesion and reduce cracking.
Tips on Laying a Levelling Screed
Three people is optimal. If you are doing it from bags, then you will need three people and two buckets. One person to put down the screed and roll it with a spiky roller. This helps remove air bubbles and lets the fibres line up (if using fibre-based screed).
Another person will need to mix with the paddle mixer, and the other prepare the water and add cement when mixing. You don’t need to do it this way, but it worked well for us.


Next Up: The Floor
That’s it! The next photos are putting down a floor. We faffed around debating what type of overlay to install and how it would affect the conduction from the floor to the laminate but decided it didn’t really matter. So we went for a cheap option from Screwfix. This was a budget installation after all! I wanted to minimise the insulating properties of overlay there were some options which had cutouts, but I wasn’t convinced it was any better.


Total approximate costs
| Material | Quantity | Unit Size | Unit Cost | Cost per sqm | Total Cost |
|---|---|---|---|---|---|
| Overlay Panels | 70 sqm (98 boards) | 1200x600mm boards | £13.00 per board | £17.81 | £1,246.56 |
| Tile Adhesive | 10 bags | Standard bag | £13.00 per bag | £1.86 | £130.00 |
| Polypipe | 600m | Standard pipe | £0.73 per meter | £6.29 | £440.00 |
| Self Levelling Screed | 40 bags | Standard bag | £15.00 per bag | £8.57 | £600.00 |
| Total | £34.52 | £2,416.56 | |||
Note: Cost per sqm calculated based on 70 sqm total area for all materials.
Underfloor Heating Systems Terminology
| Term | Definition | Key Considerations |
|---|---|---|
| Overlay System | Insulated panels installed on top of existing subfloor to house heating pipes | Adds 20-40mm floor height; suitable for suspended timber floors with limited load capacity |
| Subfloor | The structural floor base (typically plywood, OSB, or floorboards) that supports the heating system | Must be level and structurally sound; existing subfloor may need reinforcement |
| Chipboard Routed Subfloor | Pre-routed chipboard panels that replace existing subfloor, sitting directly on joists with integrated pipe channels | More structural but requires complete subfloor replacement; minimal height addition |
| Screed | Liquid cement-based layer poured over pipes to provide thermal mass and level surface | Self-levelling but not truly self-levelling; requires 2+ people for installation |
| Egg Crate System | Polystyrene insulation with pre-formed channels allowing snail/spiral pipe layout | Provides even temperature distribution but adds significant weight (~50kg/m² with screed) |
| Serpentine Layout | Pipe installation pattern where pipes run back and forth in parallel lines | Simpler installation but can create temperature variations across floor |
| Snail/Spiral Layout | Pipe pattern where flow and return pipes spiral together from outside to centre | More even temperature distribution but requires egg crate or similar channelled system |
| Manifold | Central distribution unit that connects multiple pipe loops to the heating system | Size depends on number of circuits; affects pressure loss and flow balance |
| Flow and Return | The hot water supply (flow) and cooled water return pipes in each heating circuit | Temperature difference affects floor temperature uniformity |
| Dead Load Capacity | Maximum weight a suspended floor can safely support | Critical for suspended timber floors; limits choice of heating system type |
| Thermal Conductivity | Material’s ability to transfer heat effectively | Higher conductivity materials (tiles) improve system efficiency over insulators (carpet) |
| Pipe Runs | Individual circuits of heating pipe from manifold out and back | Maximum 100m for 16mm pipe; shorter runs provide more even temperatures |
| Cement-Coated Overlay | Insulated panels with cement surface allowing direct tile installation | Premium option that eliminates need for separate screed under tiles |
| Foil-Coated Overlay | Insulated panels with reflective foil surface | Standard option requiring additional screed or direct mechanical fixing |
| Mechanical Fixings | Screws and washers used to secure overlay panels when not using adhesive | Required for laminate floors; avoids adhesive mess and chemical off-gassing |
| Tile Adhesive | Cement-based adhesive used to fix overlay panels and tiles | Dual purpose: secures panels and provides base for tile installation |
| Pressure Test | Testing pipe circuits for leaks before covering with screed/flooring | Essential safety check; requires manifold connection and pressure testing kit |
| Fibre-Reinforced Screed | Screed containing synthetic fibres for tensile strength | Better for thin applications and areas prone to movement/expansion |
| Prime/Priming | Applying bonding agent to overlay boards before screeding | Improves adhesion between screed and boards; reduces cracking risk |
| Thermal Mass | Material’s ability to store and slowly release heat | Higher thermal mass provides more stable temperatures but slower response |